Photography • 2026
Antelope Canyon Photography: How to Get Great Shots
Most of the famous pictures were taken handheld on an ordinary guided tour. When you go, how you set your camera or phone and what you are allowed to carry matter far more than booking a special photo tour.
In Short
Timing first, then technique
Antelope Canyon is one of the most photographed slot canyons in the world, and the swirling sandstone and shafts of light make it hard to take a bad picture. Getting from a nice snapshot to the images that made the canyon famous comes down to four things: the time of your tour, a few camera or phone settings, knowing which gear you can bring, and choosing the right canyon.
This guide covers all four for phones and cameras, plus where photography tours stand in 2026. It is written to help you come home with pictures you love, whether or not you book through us.
Photo Tours In 2026
What happened to photography tours
For years, Upper and Lower Antelope Canyon ran dedicated photography tours: longer visits, sometimes with tripods allowed, for photographers who wanted extra time and space to work. Older guides still mention them a lot.
Daytime photo-only tours at Upper ended in 2019. The Navajo Nation's parks department now says on its Lake Powell Navajo Tribal Park page that it does not issue photography or filming permits for Upper or Lower Antelope Canyon, because of the number of visitors. Antelope Canyon Tours, one of the long-running Upper operators, allows only handheld photography on its sightseeing tour and states in its FAQ that it does “not allow photo sessions on tour.” Rules on tripods, monopods and professional gear have tightened, they vary by operator and by season, and they can change with little notice.
The photo tours that still run
- Upper Antelope Canyon at night. Adventurous Antelope Canyon's night photography tour starts about an hour after sunset, lasts 3 hours and requires a tripod. It costs $285 for photographers aged 21 and over, or $65 to tag along without gear, and is booked direct with the operator.
- Antelope Canyon X. Navajo Parks lists hiking and photography tours on request at this quieter slot canyon east of Page. The Antelope Canyon X hiking tour with a photo tour option adds a 3-hour photography option on which you may bring a tripod and one camera bag. It rates 4.7★ from only 42 reviews, so read the recent ones, and check the photography option's price when you pick a date.
- Tours beyond the canyon. Antelope Canyon Tours, which bans tripods on its Upper sightseeing tour, allows them on its Vermilion Cliffs tours.
So don't build the whole trip around getting a place on a specialist photo tour. You don't need one: standard tours allow phones and handheld cameras, and with the right timing and technique they are more than enough for spectacular pictures. If a photo tour fits your dates and you want the extra time, treat it as a bonus.
Round Out The Trip
Other experiences you might enjoy around Page
Few photographers stop at one canyon. Lower Antelope Canyon trades the beams for twisting, V-shaped passages entered on steel ladders, and Antelope Canyon X is a quieter Navajo slot a short drive east along Highway 98. On the water, the Lake Powell photo boat tour runs from Wahweap Bay past Glen Canyon Dam into the flooded end of Antelope Canyon, with the captain helping with photos, and the Horseshoe Bend overlook is about 10 minutes from Page. Live availability for tours around Page is below.
Timing
The biggest factor: when you go
More than any camera setting, the time of your tour decides what your photos look like. When you book, you are choosing both the date and the entry time.
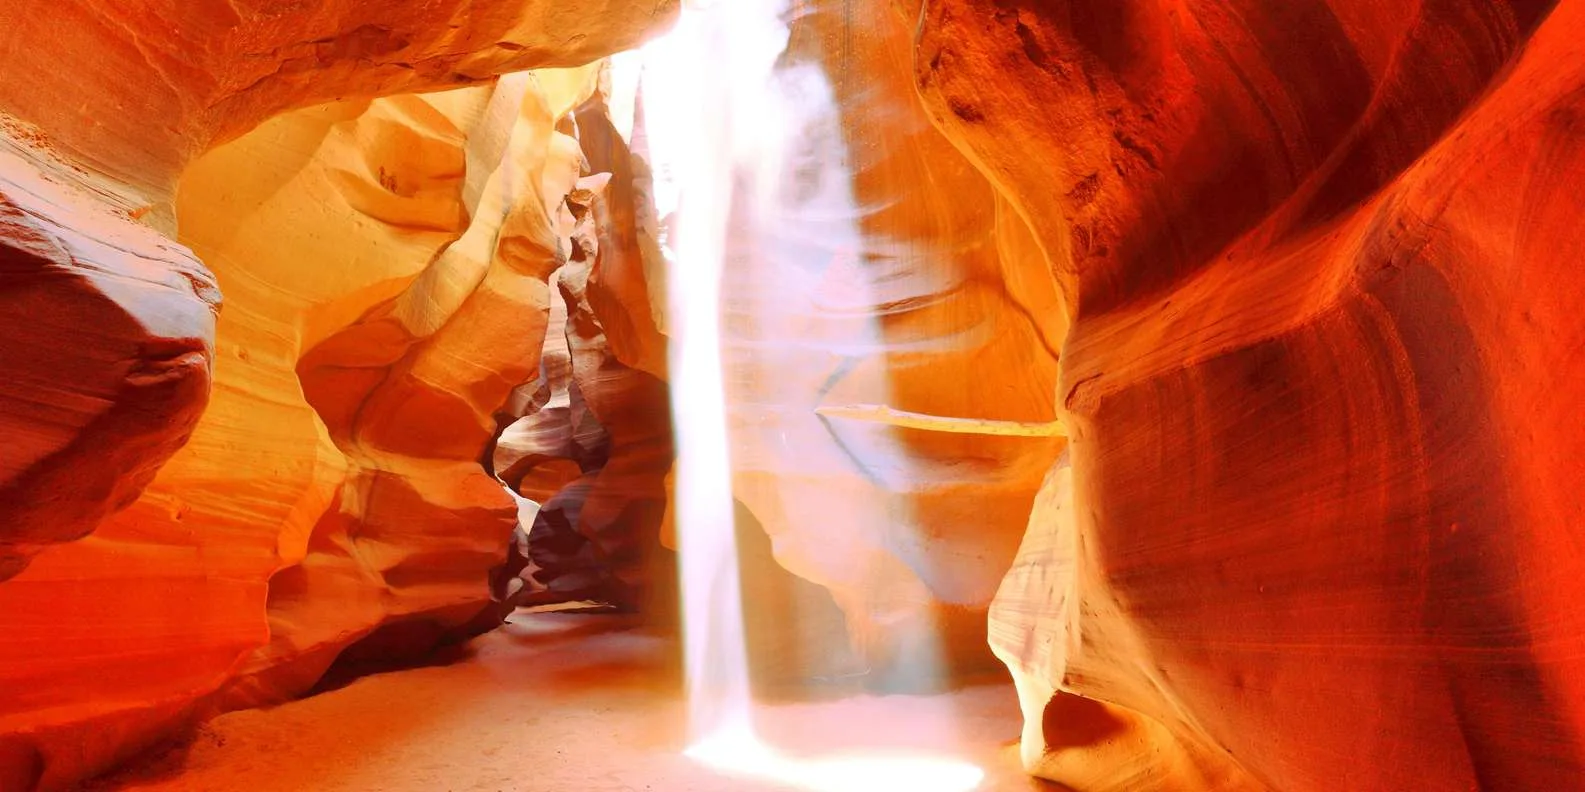
For the famous vertical light beams, you need Upper Antelope Canyon on a midday tour, roughly 11 a.m. to 1 p.m. Arizona time, depending on the operator and your date. The beams appear mainly from about April through September, when the sun is high enough to send shafts of light down to the canyon floor, and they are strongest from late spring into summer. If the beam shot is your goal, book that midday slot early: it is the most in demand of the day. The Upper Antelope Canyon Prime Time Entry tour is sold for that window, at 4.5★ from 594 reviews.
For rich, glowing color without the beams, you have far more choice. Mid-morning and mid-afternoon light bounces beautifully off the walls, and the softer tones early and late in the day are lovely in their own right. Lower Antelope Canyon in particular photographs well across a broad range of hours.
Beams and color both depend on clear skies. A cloudy midday can mute the beams or hide them entirely, and no operator can guarantee them, so leave some flexibility in your plans if they are the main goal. From roughly July to September, monsoon storms bring flash-flood risk, and operators can delay or cancel tours at short notice even when Page looks clear. Our best time to visit guide covers the beam season month by month.
Settings
Camera settings that work
You don't need to be an expert, but a few adjustments make a big difference in the canyon's tricky mix of bright light and deep shadow.
With a dedicated camera (DSLR or mirrorless)
- Shoot in RAW if you can. The range from bright beams to deep shadow is far easier to recover in editing from a RAW file.
- Raise your ISO, often to 800–3200, to cope with the low light, since you will be shooting handheld without a tripod.
- Use a wider aperture (a lower f-number) to let in more light, or balance it for depth as needed.
- Watch your shutter speed. Keep it fast enough to avoid blur while handholding, which usually means leaning on a higher ISO.
- Meter for the walls, not the beams, or bracket your exposures. The bright beams can fool the camera into underexposing everything else.
- Set white balance with care. Auto often works, but the intense oranges can trick it; shooting RAW lets you fix this later.
With a phone
- Tap to set focus and exposure on the area you care about, and drag to adjust brightness.
- Use HDR to balance the bright and dark areas.
- Avoid the flash. It flattens the color and kills the ambient glow, and the main Upper and Canyon X listings on GetYourGuide ban flash photography anyway.
- Use night or low-light mode in darker sections, holding as steady as you can.
- Shoot in your phone's RAW or ProRAW format if it has one, for more room when editing.
- Skip heavy zoom. Move to change your framing; digital zoom degrades quality in low light.
What To Bring
What gear is allowed
The rules here are stricter than many photographers assume. On standard tours you can usually bring a phone or a handheld camera. What is usually not allowed:
- Tripods, monopods and selfie sticks. These are the big ones. They are generally prohibited on standard tours because they slow the groups and crowd the narrow spaces.
- Large camera bags and backpacks. Some operators allow clear bags only; on the Upper Antelope Canyon Entry Ticket and Guided Tour (4.5★, 3,007 reviews), no bags are allowed on the walking tour at all and they stay in your vehicle.
- Professional rigs and lighting in some cases. The same listing says large camera equipment and flash or lighting equipment are generally prohibited, and rules differ by operator.
With a tripod off the table, plan to shoot handheld, which is exactly why the higher-ISO, wider-aperture approach above matters. Rules vary by operator and change over time, so check your booking confirmation, and don't count on bringing gear that older guides say was once allowed.
Which Canyon
Upper vs Lower for photography
Both canyons are extraordinary to photograph, but they suit different goals.
Upper Antelope Canyon is home to the classic images: the vertical light beams and the wide, glowing “cathedral” compositions. If you want the shot that made the canyon famous, choose Upper at midday in beam season. Its flat, sandy floor also makes it easier to stop and frame.
Lower Antelope Canyon suits a more creative eye. Its twisting, V-shaped passages, tighter frames and layered swirls make for intimate, abstract compositions, and its diffused light looks beautiful across more hours of the day. Many photographers prefer Lower's shapes even without the beams, although the ladders and narrow spots mean you are often shooting on the move. The Lower Antelope Canyon entry and Navajo guided tour is the most-reviewed Antelope Canyon tour, at 4.7★ from 9,632 reviews.
If you can, do both: the beams of Upper and the sculpted, intimate passages of Lower between them give you the full photographic range. Our Upper vs Lower comparison covers price, difficulty and crowds, and the Lower Antelope Canyon guide covers the ladders.
Inside The Canyon
Practical tips for better shots
A few habits that consistently help once you are inside.
-
1. Look up and back
The most striking compositions are often overhead or behind you, and the light changes with each step.
-
2. Include a sense of scale now and then
A hint of a person or the canyon's curve gives your images depth.
-
3. Shoot continuously
The light shifts as you move and as clouds pass. Take more frames than you think you need.
-
4. Ask your guide
Navajo guides know the canyon intimately and often point out the best angles and moments. Some will toss a little sand into a beam for the classic glowing-column effect, where it is permitted.
-
5. Keep moving with the group
The spaces are tight and the tour keeps a pace, so work efficiently instead of lingering.
-
6. Protect your gear from sand
Fine sand gets everywhere. Keep lenses capped until you are shooting, and don't change lenses inside the canyon.
Expectations
What to expect on the day
Two reminders help the visit live up to the photographs you have seen. First, the canyon is busy, especially in the beam window. You will be photographing within a moving group, so frames with nobody in them take patience and some luck.
Second, the beams depend on the weather and are never guaranteed. Go in with flexible expectations and good technique, and you will come away with pictures you love even if not every element lines up.
A Note From Us
Get the slot right and the pictures follow
Great Antelope Canyon photos come down to timing and knowing what to expect far more than expensive gear. The part that can go wrong is the booking: midday Upper slots in summer are the first to go. If you are trying to time a beam visit or choose between Upper and Lower for the pictures you want, our Upper Antelope Canyon planning guide explains the tour times, and you can check an Upper slot for your date below.
FAQ
Antelope Canyon photography questions people ask
Are there photography tours at Antelope Canyon?
Not in the old daytime form at Upper or Lower. Those tours ended at Upper in 2019, and the Navajo Nation issues no photography or filming permits for either canyon. A few photo tours remain, including a tripod night tour of Upper run by Adventurous Antelope Canyon and a photography option at Antelope Canyon X. You don't need one for great images, though: standard tours allow phones and handheld cameras and, with good timing, produce stunning results.
Can I bring a tripod into Antelope Canyon?
Not on a standard tour. Tripods, monopods and selfie sticks are generally not allowed, so plan to shoot handheld. Rules vary by operator and change over time, so confirm with your booking.
What's the best time of day to photograph Antelope Canyon?
For the vertical light beams, a midday tour of Upper Antelope Canyon, roughly 11 a.m. to 1 p.m. Arizona time depending on the operator, from about April through September. For rich color without beams, mid-morning and mid-afternoon are excellent, and Lower photographs well across many hours.
What camera settings should I use in Antelope Canyon?
Shoot RAW if possible, raise ISO (often 800 to 3200) for handheld shooting, use a wider aperture, keep shutter speed fast enough to avoid blur, and meter for the walls or bracket so the bright beams don't underexpose everything. On a phone, use HDR, tap to set exposure, avoid flash, and use low-light mode.
Is Upper or Lower Antelope Canyon better for photography?
Upper is best for the classic beam and cathedral shots; Lower is favored for intimate, abstract compositions and flexible timing. Doing both gives you the full range.
Can I get good photos of Antelope Canyon on my phone?
Yes. Modern phones do very well in the canyon. Use HDR, set exposure by tapping, avoid the flash, use low-light or RAW modes, and frame by moving instead of zooming.
Are the Antelope Canyon light beams guaranteed?
No. Beams depend on clear skies and the right season and time of day. A cloudy midday can mute them, and no operator can guarantee them, so keep your expectations flexible.
Ready to Book?
Book the midday slot for the beams
For the light beams, choose a midday Upper tour on a date from about April to September; for color without the crowds of the beam window, an earlier or later slot works well. Phones and handheld cameras are welcome; tripods, selfie sticks and bags are not. The $15 Navajo Nation permit is charged separately by most operators.
Check dates & prices on GetYourGuide
Free cancellation on most options up to 24 hours before departure · Secure checkout via GetYourGuide